It’s all about creativity and the sharpness of yourself when it comes to tennis ball machine DIY. It’s not rocket science to do so. Still one needs to be creative and willing to spend some time on it.
There are amazing tennis machines to buy, but if you want to learn how to make a tennis ball machine then here we are to disclose the best ways of doing it yourself.
Contents
List of Homemade Tennis Machine Components and Materials
When you are going to make a homemade tennis machine you have to get some Tennis supplies from any near the mechanical store which are listed below.
- Beam 2424-312
- U Bracket-C
- Flange Bearing
- 125 PU Wheel
- Bracket
- Shaft Collar
- Acrylic Sheet
- 1-direction motor driver
- Plate
- Bracket
- Socket Hexagon Button Head
- M4 Lock Nut
- Timing Pulley
- Plastic Rivet
- 7 GB Socket
- Jackscrew
- Washer
- Rubber Foot
- CNC Motor Case
- D Shaft
- Shaft Connector V2.0
When you are done bringing all the tennis supplies and now it’s time to get them together and start building the tennis machine step by step. There is nothing to get confused about and nothing to get tired. We have brought a very simple way that will give a homemade working tennis machine.
We are going to show you everything step by step and you have to stay focused and keep following each step carefully and as taught.
Let’s dive right it,
Step 1
Bear in mind that you are not going to build the exact machine which is produced by big tennis brands. We will teach you to make a machine that throws balls into your desired distance without having all the progressive tennis ball machine features.

So, the step one is prepare all the parts and make them ready to join them. Furthermore, we are going to show the L shape machine. That is not necessary to have same shape, you can build a machine on the bases of your own vision/structure.
Step 2
Now, join the beams by screws and nuts. Make sure to do this process very nicely. This is the base of your machine. if you didn’t do it well there will be an issue.
Step 3
You have to keep all screw nuts tighten very well because when the machine starts throwing balls it vibrates severely.
Step 4
When you made L shape ready by using beams and nuts now its time to add rubber foot pads at all four down side to make a machine stand easily.
Step 5
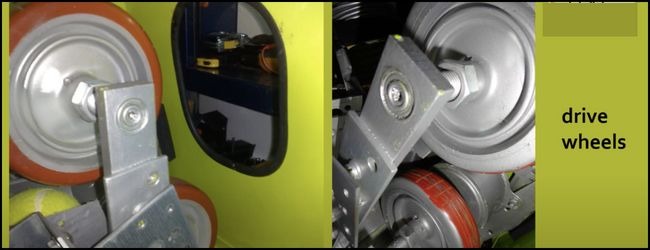
After completing the L shape, now you have to start working on wheel and its rotation including fixing it with beams.
Step 6
Now you have to join the rivet with a timing belt with glue. and repeat the process for another wheel.
Step 7
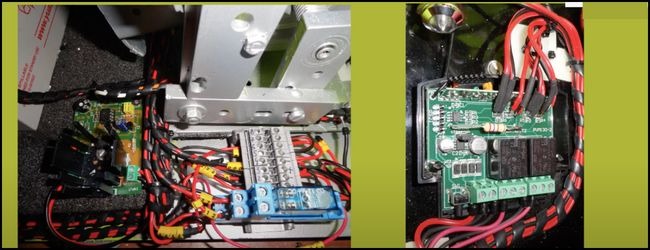
After, connecting the wheels with beams now you have to install the battery and other electrical connections. Make sure the battery is tightened with a screw so it wouldn’t fall because of vibrations.
Step 8
Adjust the moving bearings and fix them into place.
Step 9
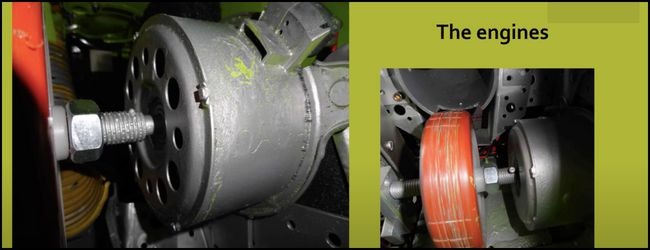
Install circuit and start wielding to add a motor.
Step 10
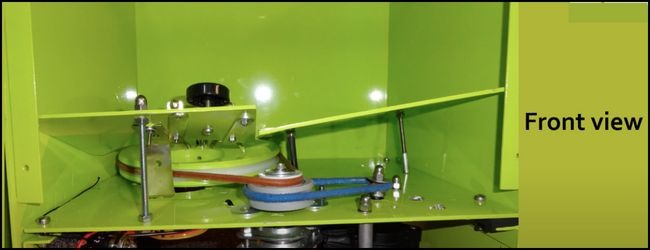
While wielding. to make place for motor make sure to keep the spot for ball tube.
Step 11
Now, you can connect all together, like the motor to rotating wheels and electric wires to the motor.
Step 12
This is it. You can now get a silver or steal sheet if possible. Just cover the machine and give it a little shape. However, you have to make sure that the machine is with out navigational system, so if you put a sheet around the machine it would get more heavier.
Step 13
Done! It’s time to get ready for playing with the machine.
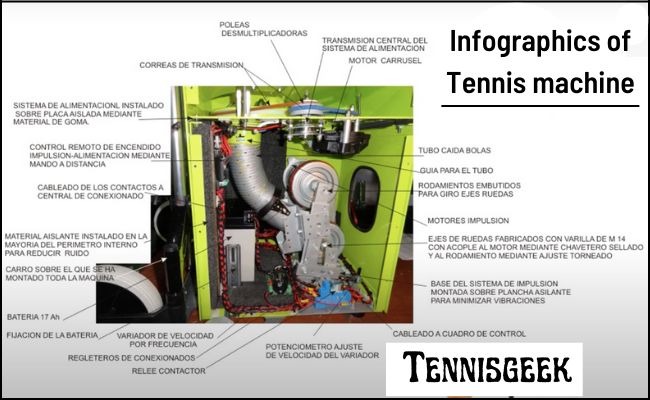
Infographic of Homemade Tennis Machine Essentials
Difference Between Homemade and Branded Tennis Ball Machines
There is a huge difference between homemade tennis machines and branded tennis machines. When you go to make a tennis machine at home you are only able to make a machine that throws balls without having customizations, oscillations, and elevation features.
Tennis machines made at home only allow you to hit the balls without oscillation and other customizations. When we talk about branded tennis machines, you get so many features like calm navigation and cool looks like spin shot or lobster tennis machines.
A homemade tennis machine is difficult to carry from home to court, whereas a branded tennis machine is easy to maneuver due to its structure and wheels.
You can make your own tennis machines very easily, but you have to pay a lot for branded tennis machines.
It is possible to make your own tennis machine and it may not last a very long time, whereas readymade tennis machines include a warranty and guarantee. It is expected that you will be able to play for 5 to 6 years without any interruptions.
As a matter of fact, you need to keep updating the ready-made machine by replacing some of its parts, like the motor and other rotating wheels.
Tennis Ball Machine DIY Complete Process
Homemade Tennis Ball Launcher
It just looks complicated, but actually, when you broke it down you will see that is quite easy to make your own tennis ball machine. There are tennis ball machine parts which you need to learn about them.
For example, there are a ball hopper, rotating wheels which make the ball topspin and backspin, and a tube that makes the ball fall into the right place between the rotating wheels.
Nevertheless, you can copy the Tennis twist machine because this machine is simple to be built. Obviously, it would be tough to copy the shape also but at least you can get ideas about how this functions.
Moreover, you can check this comparison between tennis tutor vs Lobster this will help you to know how to make a machine. Even if you go for deep research you can make the fastest ball thrower as well.
Tennis machines came up with an idea that revolutionized the game you should read who invented the tennis machine and why he did. This will help to make up your mind clear about making tennis machines by yourself.
1 – Understand the mechanics of Tennis Machines
Tennis machines are so simple, if we just take a look at the machine we will notice that there are just a ball hopper, rotating wheels, a Motor, tube, handle, and small tires to navigate the machine. That’s it.
If you think you are creative and you have enough time to do it then you can make it happen. You must have basic knowledge of how a machine works only then you can make it happen.
2 – Electric Parts
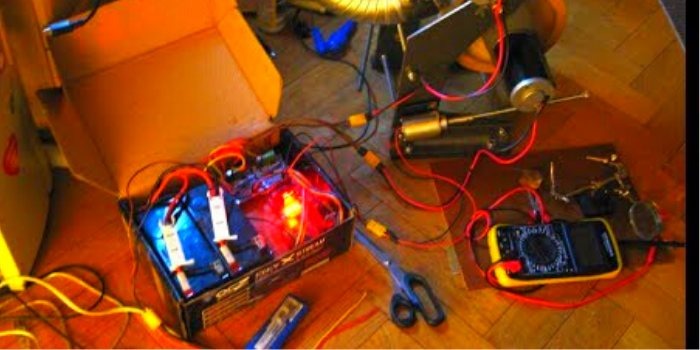
In electric stuff, all you need is the best power and cord to recharge it and you have to get a motor that will keep the wheel rotating for throwing the balls.
Furthermore, the fan is also important to draw the ball into the tube to fall in the right place. If you can not make the fan function work properly then leave it, without a fan it also works fine. Just make sure the tube is in the right place and meets between the wheels.
3 – Ball Hopper
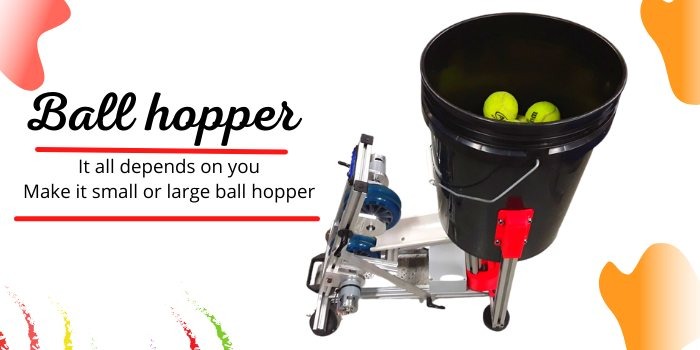
When we talk about ball hopper, there is no rocket science. Just need a bucket to replace the fancy tennis ball hopper, that’s all.
Now you got a free well-to-have bucket that can hold balls up to 400 balls. lol. Not like other machines like lobster and Spinshot which allow you only 150 balls maximum.
4 – Wheels and Tube
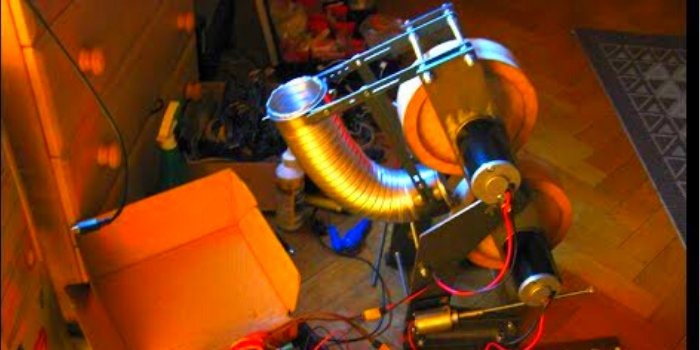
These both are very important parts of machines. A tube directs the ball to the middle of the wheels and then rotating wheels throw them into the top and backspins toward the player. All you need is to make them strong and exactly to the point. It should be well measured and well maintained.
5 – Machine Structure
The fifth point for the homemade machine, till now we have covered all the important points which are little technicals somewhere. It’s time to design the machine-like, attaching handles at the back and giving it a beautiful shape.
It all depends on your creativity. Like, think and grow rich. Here you need to implement like this, think, and design beautifully. LOL.
However, if you just leave the body cover and focus on the mechanism/parts of the machine it is still good. Having a good body cover and well-designed structure is cool to play on the court.
Why We Should Try To Make Homemade Tennis Machine
There are three main reasons to build a tennis ball machine at home.
- Making a tennis machine yourself saves you a lot of money
- You will have a good experience.
- It will make you a creative person
- You will build a hunger to try to make most of your required things at home.
FAQS Related Homemade Tennis Machines
Conclusion:
That’s all peeps! You might be wondering how simple is this to make a tennis ball machine right? It all depends on your time and your creativity. Those people who own the brands like Lobster and Spinshot also started like this. Now it’s your turn. Good Luck.